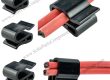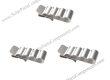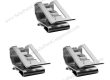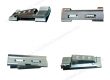
PV cable clamps are key components used to fix and manage cables and wires in solar systems.
Proper installation not only ensures that the cables are safe and secure, but also extends the service life of the entire system.
First, before starting the installation, make sure the following preparations have been completed:
Safety check: Wear appropriate protective equipment, such as gloves, safety glasses, etc.
Check the number of wire clamps: Determine the number of PV cable clamps required based on the design drawings of the solar system.
Clean the installation location: Make sure the installation location is clean, flat, and free of obstacles.
Secondly, the installation steps are as follows:
–Step 1: Determine the installation location
According to the layout diagram of the solar panel, determine the location where the cable needs to be fixed. Generally, the PV cable clamps should be installed at a certain distance (such as every 30-50 cm) to ensure that the cables will not loosen or sag.
–Step 2: Choose the right cable clip
According to the diameter and number of cables, choose a cable clip of the appropriate specification. Wire clamps of different sizes are suitable for different types and quantities of cables.
–Step 3: Fix the cable
Place the cable in the clamping groove of the cable clip. Make sure the cables are neatly arranged to avoid crossing or twisting.
–Step 4: Install the cable clip
The wire clip is usually fixed by snap-on fixing: some PV cable clamps are designed with snap-on structures, and only need to snap the wire clip into the reserved groove on the frame of the solar panel or the bracket, without additional tools.
–Step 5: Check and adjust
After completing the initial installation, check whether all cable clip are tightened and the cables are stable. If necessary, adjust the position of the cable clip or the tightness of the cable.